Showing posts with label home. Show all posts

Wednesday, January 17, 2018

The "Where I Got It" of the Harry Potter Guest Room

If you've seen the reveal post on our amazingly magical Harry Potter guest room, you see that there are a TON of magical objects throughout the room.  And not just objects... but gorgeous wall murals, wall decals, and DIY goodies!

With that being said, I guess it means that as I add to this room, I will also be adding to this post so you guys know where I got my goodies.

So, we'll start the list! I will include links to where I got everything so it's as easy as clicking away to see where they came from!  Some stuff will have explanations so you kinda know what to expect if you decide to order something.  I won't give information on sizing or anything, because that'll all obviously depend on what size YOU would want to create your creation with!

All of the WORDS for each item are clickable and will take you to the site where I purchased them!

Wall Art is first!

House Crests:
These were purchased from Etsy shop Modern Vector.  She had a couple of sizes available, so I didn't have to go custom here.  I was able to order a size that fit perfectly on the wall.

Gryffindor Wall Decal-- we chose the Burgundy decal color
Ravenclaw Wall Decal-- we chose the Dark Blue decal color
Hufflepuff Wall Decal-- we chose the Black decal color
Slytherin Wall Decal-- we chose the Dark Green decal color

Also purchased from Modern Vector was our "directional" sign that is opposite our Patronus wall.

Directional Wall Decal-- we ordered this in the Gold decal color {which became a theme for a lot of our decals}


Quotes:
There are several different quotes that we ordered.

The "In This House" quote came from Aparecium Design on Etsy.  I don't see this decal in their shop anymore. That makes me sad because it is amazing on our wall.  We ordered it in gold.

Albus Dumbledore Quote
This one came from Etsy shop Spiffy Decals.  I kinda "winged" it on this one.  I knew what size space I had, but didn't really want a custom piece that I had to message and size out to fit perfectly on the wall.  So I ordered directly from the shop in the size they had available and just cut it out how I wanted to make it fit above the door.  This was also ordered in gold.

Harry Potter Quote and Owl
This decal came from Etsy Shop JeetVinyl.  This is another one where I "winged" it {no pun intended, lol}.  I ordered a size that was pre-made that I thought would be great on the wall, and then had to adjust the words to fit where I wanted them to.  This was once again, ordered in gold.

Patronus Wall
The "end result" decals for this wall came from Dana Decals on Etsy.  This ended up being a custom order based on the "Always" that they had available, combined with a deer from a woodland animals set she had.  I had measurements ready to go so they made it custom to what I requested.  Also, the "Always" quote was customized to include the entirety of the quote {"After All This Time"} in a font to match the "Always".  The words were ordered in white, the deer in silver.

Side note:  I had originally gone with a different Etsy seller for my Patronus.  They were great working with me to get a custom size, but they sent the wrong color the first time (I asked for gold and got white), and then when they sent their replacement, the 2 pieces of the deer didn't align properly and looked funny.  So, we cancelled that order because I was a little cautious of trying to correct the order AGAIN {plus I hated that it was messed up and they were having to use so much vinyl each time to correct it} which ultimately led to me finding the shop that DID give me an amazing deer patronus and Always quote.

Marauder's Map
This one didn't come from Etsy (shocking, right?!)
It came from a website called GeekeryMade that I found on Pinterest.  It was one of those things that I was just perusing the Pinterest for HP ideas (a WAY long time back) and came across it.  The price on it was amazing, which I loved.  When we got the decal in, I had to cut it into pieces because it was just BARELY too big to fit in the space I wanted it to fit into. Also, it was a ton easier to put it up in sections rather than all at once.  Despite having to adjust the size, it's a great piece, looks amazing and is a cool statement to see when you first walk in. This was ordered in Black.

Platform 9 3/4 Door Decal
Etsy, again!  This was from shop Recallart.  This shop is based in Ukraine, and it took a bit longer than "normal" to get to me... but was really less than a month.  This is a gigantic sticker.  It was a bit of a pain to put up, but it looks so awesome!

Hogwarts Wall Mural
This is the "wow" factor of the room, in my opinion.  And it is GIGANTIC.  I had the idea that I wanted this and had to scour the internet til I found the perfect piece.  I found the mural on Etsy, at 3DWallBoutique.  The shop owner, Ira, was amazing to work with while we figured out what I wanted! Communication was great and I got an amazing wall decal!  The link I provided for this one shows you the general idea of what we went with.  I opted for NO frame, and got the print in a glossy finish.  This also shipped from Ukraine and took about 6 weeks to get to me {take holidays into account, and it really wasn't that long before it got to me}.


Onto the other goodies of the room!
I am going to TRY to put these in ABC order, so if you're in love with a certain item in the room, it's easier to find.  Not sure if that system is gonna work- but let's give it a try....
Description of the goodie takes you directly to that item via clicky link, the shop/website is also a clicky link.


All The Other Goodies:

Bedding- Hogwarts Crest (NOT used in the room, but a good comforter!):  Hot Topic
Bedding- Hogwarts Crest {bed in a bag-- this is what's ON the bed}:  ThinkGeek
Birdcage for HedwigOriental Trading Company
Dark Mark Glow in the Dark Vinyl:  Etsy Shop The Bookish Co.-- HIDDEN in the room!
Deathly Hallows Lamp Shade:  Etsy Shop Geek Your Interest
Deluminator:  Universal Orlando Online Shop
Diadem- Rowena Ravenclaw Horcrux- Wal Mart (online)-- currently not available via this site
Dobby- we got him when we were in LA a few years ago on the Warner Bros Studio Tour
Dumbledore FigurineThinkGeek
Dumbledore's Army Wand Collection:  Barnes and Noble (online)
Dumbledore's Cup:  ThinkGeek
Fan Pull- Dumbledore's Wand:    Etsy Shop LambdaLighting
Fan Pull- Hogwart's Crest:  Amazon
Fat Lady Door Cling: ThinkGeek
Fawkes Plush:  ThinkGeek
Felix Felicis Necklace:  ThinkGeek  **
Firebolt Broom:  Wal Mart (online)
Flameless Candles (for DIY Great Hall piece):   Amazon
Gryffindor Sword:  Universal Orlando Online Shop
Golden Egg (from the Triwizard Tournament):  ThinkGeek
Golden Snitch Clock:  Pottery Barn Teen Harry Potter Collection
Golden Snitch Toy {not really on display in the room}:  Universal Orlando Online Shop
Hedwig Plush {puppet with sound}:  Universal Orlando Online Shop
Hermione's Time Turner:  Wal Mart (online)
Hogwart's Express Book Ends:  ThinkGeek
Hogwart's Great Hall 3D puzzle:  Target (online)
Hogwart's Astronomy Tower 3D puzzle:  Target (online)-- currently not available via this site
Horcrux Hufflepuff Cup:  ThinkGeek **
Horcrux Locket:  Wish (online)- not exactly what I ordered, but the link shows you similar.
Horcrux- Tom Riddle's Diary and Basilisk Fang:  ThinkGeek
Light Switch Plate (Lumos/Nox): Etsy Shop Scicollectables
Marauder's Map Glow in the Dark Pillow:  Pottery Barn Teen Harry Potter Collection
Marauder's Map- really works!:  Universal Orlando Online Shop
Mermaid Pillows (Sequin Pillows):   Etsy Shop Craft Encounters
Mermaid Print (From Prefect Bathroom):  Etsy Shop Tonks Treasure Trove
Monster Book of MonstersUniversal Orlando Online Shop
Outlet Covers:  Etsy Shop Scicollectables
Patronus Lighted CanvasHot Topic
Pensieve Journal Set:  Target (online)
Quidditch SetWal Mart (online)
Sorting Hat:   Universal Orlando Online Shop
Triwizard Cup:  ThinkGeek  **
Wizard Chess Set:  Think Geek  **


notes:  Don't go to the Pottery Barn Teen website unless you have a money tree, haha! Their stuff is uh-may-zing {priced at an arm and a leg} and I had to talk myself out of SO SO SO many things that I wanted!  This is your warning ;-)

** Items with the double asterisk:  I got these as Christmas gifts.  So if you're "judging" on how much I've put into this room- don't judge these ones.  They were gifts.  And seriously. If you're judging- stop.  I always look for amazing deals and bought a lot of this stuff with coupons, and discounts.  So nah!


Books!

Now, I definitely have all of the HP books and I've read them all... but I found a few books that are worth mentioning and looking into if you just love HP and want all things HP {kinda like I do, haha}.  These can pretty much be found anywhere books are sold.  I did a ton of research to try to find the best prices when I was ordering.  So, for that, I've included the links and the stores I got them at... but they MIGHT be cheaper in other places now.


A History Of Magic:  Wal Mart (online)
Sorcerer's Stone (Illustrated Edition):  Barnes and Noble (online)
Chamber of Secrets (Illustrated Edition):  Barnes and Noble (online)
Prisoner of Azkaban (Illustrated Edition)Barnes and Noble (online)
Quidditch Through the Ages:  Barnes and Noble (online)
Fantastic Beasts and Where to Find Them (Illustrated Edition):  Barnes and Noble (online)


Figurines!!
I have a small collection of boxed figurines that I am IN LOVE with, and will eventually have all of the ones they make.  These include Nagini, who is in the Horcrux collection, and then favorites like Dobby and Buckbeak.  Photos of them are in my reveal post.  These are available in several places online (Hot Topic, Barnes and Noble, The Noble Collection).  They're incredibly detailed and just super amazing little figurines! There is a "Magical Creatures" set that pays homage to Harry Potter characters, and there's also a set of Fantastic Beasts, obviously paying homage to the Fantastic Beasts movie.  I'll be getting those too- because hey, I love magical creatures!

I'm going to link these from Hot Topic, which is where I originally found them.  You can check them out on the other sites listed above as well.  I'm listing the ones I have, along with the ones I *want*/*need* to complete the collection.

Magical Creatures:

I have these ones (you can see photos of them in the reveal post):
Dobby
Buckbeak
Hungarian Horntail Dragon
Fawkes
Nagini

I WANT/NEED these ones:
Hedwig
Ukrainian Ironbelly Dragon
Gringott's Goblin
Basilisk
Dementor


Fantastic Beasts:

Occamy
Thunderbird
Niffler
Demiguise
Bowtruckle
Fwooper


Furniture!!

There isn't really  much in the way of "furniture" in this room.  There's the bed- which came from my dad. No idea where it's from or who made it.  It's just a comfy Hogwarts bed ;-)

The shelving in the room is all from IKEA

We have four Kallax shelves in black-brown..  They are the ones with the 4 cubby holes.  Most of them are laying on their side, and one is standing up for display.

The other shelving unit, when you first walk in the room, up against the Patronus wall is an EKET cabinet.  It's the cabinet with four cubbies, pluswe bought feet (known as an "underframe") for the bottom of it.  The color of this one is light grey.

I try to shop "smart" at IKEA whenever I can, lol! Quite frequently they have coupons for $25 off your purchase of $150 or more.  Easy peasy when you have SO MUCH in your whole house that is IKEA furniture, haha!!! I seriously love that place!


Now, I have lists of things I still *want*/*need* for this room, and it'll be a work in progress for quite some time til I get everything I want.  I've done research and have a few sites that I check on frequently and love the stuff they have.

I'm listing them here so you can check them out too.  Some of them are places I've bought things from, some of them I haven't but I have my eye on goodies there.  The names of the websites are clicky.

Noble Collection
Harry Potter Shop
Universal Orlando Harry Potter Shop
ThinkGeek


And whew!
That's it! All the WHERE's of where I got all of the magical awesomeness that is in our Harry Potter Guest Room <3


The "How-To's" of our Harry Potter Guest Room

So this might be a little backwards, as I am writing this post first.....
But I wanted to share with you the "how to" and what we did to create the Harry Potter themed room in our home.

I knew I wanted a HP room.  Probably not right away, but the idea came to me, and grew and grew and grew.  It seemed like it would be a fun idea.  A great little escape from reality to the land of Hogwarts and Harry Potter.

And, I think I nailed it on the head.  I absolutely LOVE the room that we created and I am so excited that I'm sharing it with everyone!

But, the how to stuff has to be shown too, and it's better that's in a separate post so that everyone can just enjoy the amazingness that is the HP guest room in it's own post.

So, in our Milan, this room is right off of the stairs, next to the laundry room (noted as Bedroom #3 in the floor plans).

I want to start off with the sketch that made all this start....
Long story short- I sold off all of my Jamberry stuff (I had a TON, and I wasn't a consultant any longer) and used that money to create this masterpiece.  When I brought the ideas to hubby, he wanted to SEE what I was talking about.  So, I drew him a sketch of what I wanted:


Now, don't laugh.... It was a rough sketch of an idea I had.
And hubby wanted to see, so I drew this pretty quickly.

But, here's what it turned into:


See?  Pretty darn amazing, isn't it?!

So, the how.  Obviously, I did some sketching and such to make sure my wall space would support the four house crests. We also had to figure out colors that worked best (this was SEVERAL trips to Home Depot for color samples).

Let's start with the colors:


Paint samples EVERYWHERE, haha!

The room can be divided up into "parts"- and there is almost a different color on every wall!

For the Marauder's map wall, we used Behr Apple Turnover.
For the Hogwarts Mural wall, and the closet wall, we used Behr Dark Crimson.
For the Patronus wall, we used Behr Express Blue {this is also the color of our morning room and mud room}
For the house crests wall:
The brown on the bottom is Behr Joshua Tree.
And the crest colors are as follows:

Gryffindor is Behr Dark Crimson and Behr Cake Spice.
Ravenclaw is Behr Flashy Sapphire and Behr Flint Gray
Hufflepuff is Behr Unmellow Yellow {used in our basement} and Behr Black {which we had leftover from our stencil project in the foyer}
Slytherin is Behr Grasslands {which we also used in our basement} and Behr Flint Gray

And, when put together- they make this:


And how did I do this? Pretty easy, really.  Well, at least I hoped it would be easy and then it was- lol!

I first measured the wall and broke that measurement into 4 pieces so I knew where to put my "boxes".
Then, I ordered my wall decals of each house crest.  Those came from Etsy shop Modern Vector.  They had the perfect sizes for what I wanted to do!
Once the house crests came in, I laid them out and traced over them.  I used a roll of paper from IKEA.  I had to double up on the paper to make it large enough.... But my idea was to make kind of an outline larger than the decal so that it had a white area to sit on top of once put on the wall.

Here's a few pictures of me doing that:

nice and flat wall decal

put the roll of paper over the top

double up on the paper so it covers the complete image

figuring out how far out I wanted to make the "outline"

look closely- I've completely outlined the Ravenclaw crest

cut it out!
After I had all four of the house crests cut out for their outlines, it was time to paint!  We used a laser level that we had purchased for our basement project (which I now realize I never really showed the entire basement off to the blog world, so I need to do that!!!) and drew a bunch of lines!

Taped off and starting to paint the brown that goes on the bottom of the wall

Lines- all measured out and ready to be painted!

Another angle of the lines
Once I had the bottom half painted brown, and the lines drawn for the four house crests, I put the outlines of the crests on the wall so I could trace those ONTO the wall.

All 4 house crests taped to the walll- had to make sure we liked the placement, and straight-ness, centered-ness, etc.


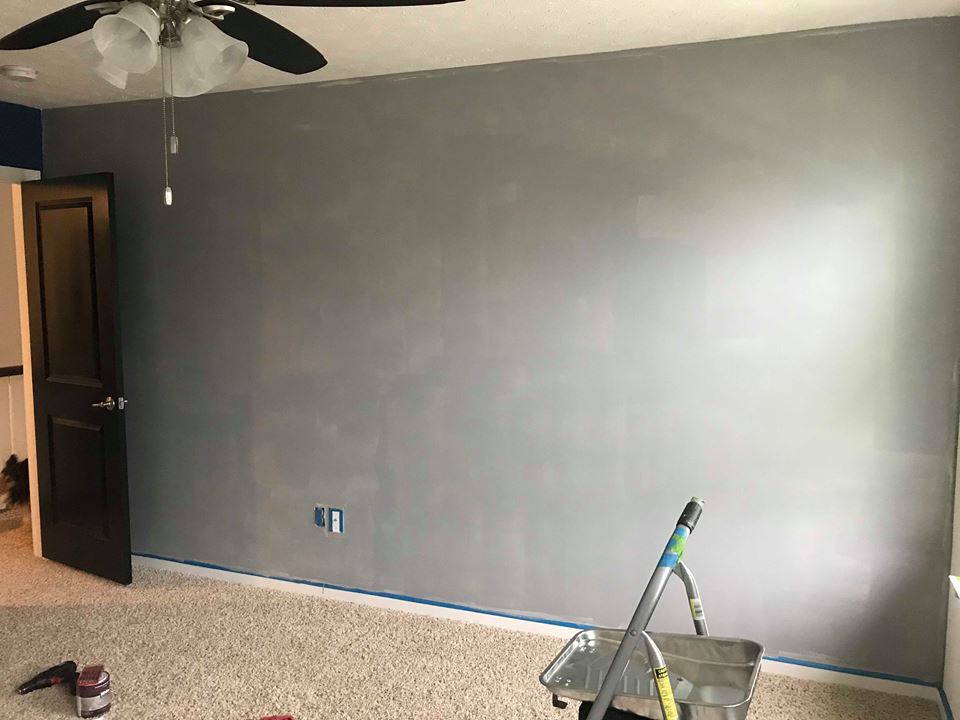
I traced all 4 house crest outlines on the wall once we decided we liked them where they were (that grey blob on the wall is primer- we had tested out a few paint colors on the wall so I just covered them up).  Once the outlines were done, it was time to tape!
Now, this was a bit time consuming.  I could only paint a couple colors at a time, based on location of that color, and making sure it wasn't butting up to another color that was being painted to.  Take a look:

All taped up for round 1

Close up of Gryffindor, all taped off for round 1

Slytherin all taped off for round 1

Where corners of colors meet up. Also take into account that I'm painting the outline of the crests on here too!
Taped off for round 1, so let the painting begin!  I started out with my grey color, since TWO of the house colors had grey in it.  This is some of the reason why the crests are placed in the order they are... I didn't want colors to be back to back against each other if they were the same color.

Grey first

Then, Gryffindor gold and the black for Hufflepuff

BEAUTIFUL clean lines! You can see the crests starting to take shape as painting was going on.
Round 1, DONE! On to round 2 of taping and painting.  We had to wait for everything to dry from these before starting the next round of taping.


Once all of the house colors were on the wall, it was like something magical had happened.  Like, that silly sketch I started out with had taken a great shape and became this super amazing house crest wall:


Once the tape was removed from this part of the process, we let everything dry, and then I started to paint the INSIDES of the house crests white.  I had pencil marks all inside the walls, so we wanted to make sure it was crisp and clean.


close ups of the finished product
After all that paint dried and set for a bit, we added the house crest decals.  The shop I got them from is mentioned above (and will be mentioned again in a post with where I got EVERYTHING we put into this room).  The first one was a bit tricky to do, but after that they just went on so easy and turned out so awesome:


The painting on the rest of the walls was just your typical painting.  We did put primer on the 2 walls that had the Dark Crimson color, just so it was easier to paint.

So, just a few more photos and then I'll call it a day here.  The reveal and all the photos you can possibly imagine will be in a post following this one!


Starting with some "before" photos of the room.  It's been a guest room since we moved in.  This bed is now in the other spare room we have, and the dresser made its way into a closet.


Crosley checking things out and trying to figure out what I'm doing taking photos of the room that always has the door closed.

Here we tested our paint colors.
Marauder's Map wall

House Crests wall

Closet- Dark Crimson Wall and Patronus wall

Painting the doors black was one of our first projects that we did.  So, I closed the door just to get the idea of what it looked like "before"

Hogwarts wall mural wall- tested both Dark Crimson and Joshua Tree (brown) colors on this wall because I was torn at first as to what color to put on this wall.


"My Patronus is a Sheltie"- probably the exact words I sent hubby when Cody sat here.  We knew what was on this wall, but we hadn't shown the "world" yet, so I couldn't show it off to anyone else.  

A teeny tiny Chance Pants checking out the colors of the room. He was very curious (and probably only 3-ish months old here) as mommy went around putting weird things on the wall.  He wanted to help.

Protector of the laser level.

Chance did eventually find some paint to stick his paw in.  Light color, luckily.

primed walls

primed walls

Contrast of colors once it was all painted.  Dark Crimson and Express Blue <3
Marauder's Map wall (with the contrast of the Dark Crimson wall too)


And, that's the "how to" for the biggest part of the project.

If you're curious where I got everything for this room.... check out that post here:  The "Where I Got It" Post

Another "how to" I can go over really quick is how I did my little Great Hall homage.  I have some hanging candles in one corner of the room.  See them here:


There are more photos in my reveal post, so you can truly appreciate how fun these are.

The candles for these were bought off of Amazon {link to where I purchased them is in my Where I Got It post}.  They are battery operated, and I turn them on/off with a remote!

To make this, I bought an embroidery hoop from the craft store.  I painted it "antique gold"- which is paint I have for another project I'm working on.
Then, I took each individual candle and tied fishing line around them.  I made them various lengths and then put them on the hoop, spacing them out just a bit so they weren't on top of each other.
Once I had them in place, I took a hot glue gun and glued the fishing line that I had tied on the embroidery hoop. This way they really stayed where I wanted them.
I took additional fishing line and tied 4 pieces to the hoop.  This acted as the top part that goes to the ceiling.  I got some hooks from the hardware store and put them in the ceiling, and VOILA!

Great Hall candles hanging in our very own Harry Potter Guest Room!


And, a final "how to":  House Points!
I found this on a blog via Pinterest.  Click the link here if you want to check out that original post.

So, supplies.
I rounded up supplies from the Dollar Tree, Michaels and Hobby Lobby.
Specifically:  The glass containers, candle holders, and red and green sand came from the Dollar Tree.  Blue Sand came from Michaels, and the Yellow Sand from Hobby Lobby.
I also needed some hot glue, which I pretty much keep readily available in my craft room.

The House Crests on the front of each glass container was also found online. Check them out here.


I was able to print them to the size I wanted {using white cardstock}, and then I used my Cricut to cut them out so I had super amazing and perfect cuts.

For the How To.
I first used the hot glue and glued the glass candle holders to the bottom of the glass container.  

Next, I filled each of the four containers with one color sand.  I decided the amount of sand I wanted in each one.  Obviously Gryffindor got the most, because well, Gryffindor.  I used a funnel to get the sand into each container to avoid a disastrous mess.

The glass containers each came with a little cork top, so once I had them filled, I hot glued the cork to the opening so if something falls over, it won't make a mess.

Finally, I took some little stickies I had, attached them to the crests, and VOILA! DIY House Points that were cheap and are super fun!!


I will have a separate post for "how to" for my Mirror of Erised, as it's a pretty in depth project that I can do step-by-step directions :-)

Next post will include a list of everything we got for this room, and where we got it from.  I have a feeling for a while this is going to be a "work in progress" room.  I have TONS more I really want to buy for it, and a few projects I want to create to add to the room.  But, I couldn't hold off any longer showing it off.  It's a magical place.  A place to just escape the day, relax, or just admire.