Thursday, April 13, 2017

Instagram Wall

So I know a lot of us have Pinterest, right?

I do. And  I have a bajillion pins of all sorts of stuff on there. Food, funnies, DIY home projects, cute animals, dreams of things I can't ever afford.....
But back to those DIY home projects.  I've gotten several ideas and we are actually starting to do some of those projects! And I am so incredibly excited that this project is done and I am so so so in L-O-V-E with it!

The original pin I had with the site that I got this idea from is here:  Instagram Wall Inspiration Post

So, let's start out with showing you the finished project... and then I'll ramble on and on.....


I still need to get the shelving unit that I want to put below the frames, but I measured it up so that I will have a little room to add a vase/decor/etc and have it all look fabulous.

So let's talk a bit about how I went about doing this.

First, the paint!
I had originally thought that I'd paint this wall the same color that we are planning on painting the entire house (the main areas)... And that would be Silver Bullet by Behr.  So, that's what we did.

I'm not so good at the whole before/after photo thing, haha! So you get an in between photo of this one:

And once it was painted, I decided I didn't like it for the look I was going for.  These frames are WHITE. The shelf I want to put on this wall is WHITE.  So while I do love this color grey and can't wait for it to be on the rest of the house.... it wasn't right for my Instagram wall.

So, we instead went with Mission Control by Behr.  It's the color that we painted in the loft on that one long wall {for future projects that we will *hopefully* be tackling soon} and also the long wall in the foyer-- that you can actually see in the first photo I posted and in my other blog post about all of our colors throughout the house {A Pop of Color}.

There's one difference with the paint on the Instagram wall than the other 2 walls just mentioned.... We used a high gloss.  No specific reason for that except we had a quart of it for a project and I ended up not liking the way it contrasted with my other color, so it was extra.  So why not use it?!


You can see the shine of it a bit, especially if you compare it to the eggshell that's on the foyer wall in the background.

Second, the frames!
I got the frames from the same place that the blog I pinned got them.... Tiny Mighty Frames.  I scoured the internet even after finding this site, as I wanted to keep this project as budget-friendly as possible.  And, when I first stumbled upon this site and the blog that inspired all of this, the frames were quite expensive, IMO.

But internet searching didn't turn up anything cheaper or what seemed better quality, so I knew that this is who I'd be going with for my frames.  Now, when we moved in I knew I wanted to do all this, but wasn't set on doing it now.  However, one day at work I happen to be perusing my Pinterest and came across my pin for this Instagram Wall, and with a little clicking, realized that the frames were ON SALE!!! Like, more than 50% off on sale! So I had to act now! I convinced hubby into letting me get them! But, I had a problem.  LOCATION! I had no idea where I wanted this wall to go!

So, we got home that day and looked at the walls and decided that this little wall would be best.  For anyone that has a Milan, this is in between the front 2 rooms (living room and dining room)-- we didn't have ours closed off to make a study so they're 2 rooms that kinda flow together.  This wall is actually the back end of the hall closet that is in the foyer.

Measurements were taken and then I did some math.  Got a guestimate of how many frames I wanted to put up.
Something to note:  Even though these frames fit a 4x4 photo, you must actually measure it out that the frame itself is a 5x5 frame.  I didn't when I did my initial calculations and actually over-bought the number of frames I needed.

Next-The pictures!
If I can admit one thing, it's that I am trigger happy.  I take pictures of everything.  And I mean EV-er-Y-thing!  I have them saved all over the place and had a very hard time trying to decide which ones I wanted to use. 
But, for printing them:  I used Shutterfly.  More specifically, the Shutterfly app on my phone.  They advertise that you can get UNLIMITED 4x4 or 4x6 prints for FREE!  Yep, FREE!! You just pay shipping and handling.
There were a couple "catches" to this, if you will.... the first:  unlimited means 250 photos at a time.  You can't do more than that in one order.  Second- shipping was like $24 for 250 photos.
That being said.... I ordered one set of 250 followed by another like 150 photos. I was so so so indecisive about what ones I wanted to use.
And now I can say I'm thrilled with the 400+ little pictures I have.  It's one thing to thumb through them on a phone or a computer screen... but it really brings back the memories to hold a photo in your hand and just smile/laugh/cry at the memory of whatever is in the photo.
So, I took these 400-something photos, organized them by family  member/event/dog and then went through and found at least one "favorite" of each one-- and I even let Jason help with this part!

And now the fun stuff!
The Measuring!
So I tried getting super technical here. After my original "oh no!" moment that I should be measuring for 5 inches instead of 4, I got all sorts of fancy.  I wanted to make diagrams so that I could show off how awesome I could be.  That most definitely didn't happen.  Here's what did:
I measured the dimensions of our wall:  It was 39 inches across.  It's like 49-ish something inches high for as high "up" as I wanted to go.  The shelf that I want to add to the wall is like 36 inches tall. 

So I measured the wall, figured that if each frame was a 5x5 frame, that I wanted 2 inches in between each frame.  With this math, I would need 5 frames across the bottom and then I was thinking like 7 going up {I was thinking 7 inches total for each frame}.  So that would be 35 inches, with 4 inches left for the sides.  And, technically that last frame doesn't require that extra 2 inch measurement, so I put 3 inches on each side of the wall.
And from there I just measured 2 inches from the top of the first row, did the next one, and so on and so forth until I had all 7 rows of frame up.
Wanna have a good laugh at how I measured all this?
Take a look:


Yep. You're seeing that right.  I bought a yard stick from Home Depot (a steal at 98 cents).  I used it to measure up. And then, when I did the frames, I found the center point and just put a dot on my measuring stick so that I could put a nail in the same spot each time. That, and painters tape.... it worked like a charm! And you see how awesome they look!!


So the last thing I did was take some 3M tape (like the Command Hook kind) and put a little piece on the bottom of each of the frames so they'd stick to the wall.  That way I know they'll stay straight, not fall down, and it was recommended on the original blog post for the Instagram Wall.

And once this project was finished, Jason told me that he thinks we should do the adjoining two walls with photos as well! I love this thought and will be embarking on an adventure to do the other two sides so that you have Instagram Wall goodness from all angles.

Seriously, I love how this project turned out and I am SO glad we did it!!!
And just for fun before I go, a hilarious picture of our Crosley running through the yard last week.  With baseball season upon us, we are trying to give him some freedom in the house so he's not ALWAYS in the cage {he's a wall/corner/cabinet chewer-- which I think stems from being nervous from all the construction going on around us}... well, this photo was snapped when he was running crazy fast laps around the yard after our very first time leaving him out of his cage for a few hours while we went out.  He did good this particular time and was loving all the praise he was getting!


Tuesday, March 28, 2017

A Pop of Color

I wish that I had realized 5 months ago how great it was to have color in a room.
Everywhere we have lived (rented) we have always had white walls, or some boring ole drab beige or grey.
We've been eyeing colors since about the time they put a  hole in the ground to build a home for us. I've scoured Pinterest, read blogs and would just dream of all the colors I want to put on the walls.
I think every time we would go to Home Depot, we'd go to the paint department and pick out colors.
And all colors.


Seriously. Haha! I had (and still have) visions for what we wanna do. Grey for the main color of the house.  A dark blue in the morning room. Some kind of grey in the master bedroom. I was undecided on the master bath, but we are thinking some kind of light teal color. The basement we've always known. But that's a bit of a surprise for now.  But, think baseball <3
The upstairs hall bath I want a dark purple with a grey tone to it.  The theme in that bathroom is travel. And the decor is black and white.  So, I envision the purple color going well with the black and white elements in that bathroom.
Not sure about the other two bedrooms yet. But hey, it's our house and we will be here forever, so we have time.
I want some kind of fun green in the laundry room. Not lime green, and not mint green... but something fun and bright. And it's the laundry room. No one has to like the green in there but me, haha!

So yeah... colors everywhere!
And we have started painting! We were SO intimidated at first, but now that one room is done we want to just paint, paint and paint some more.

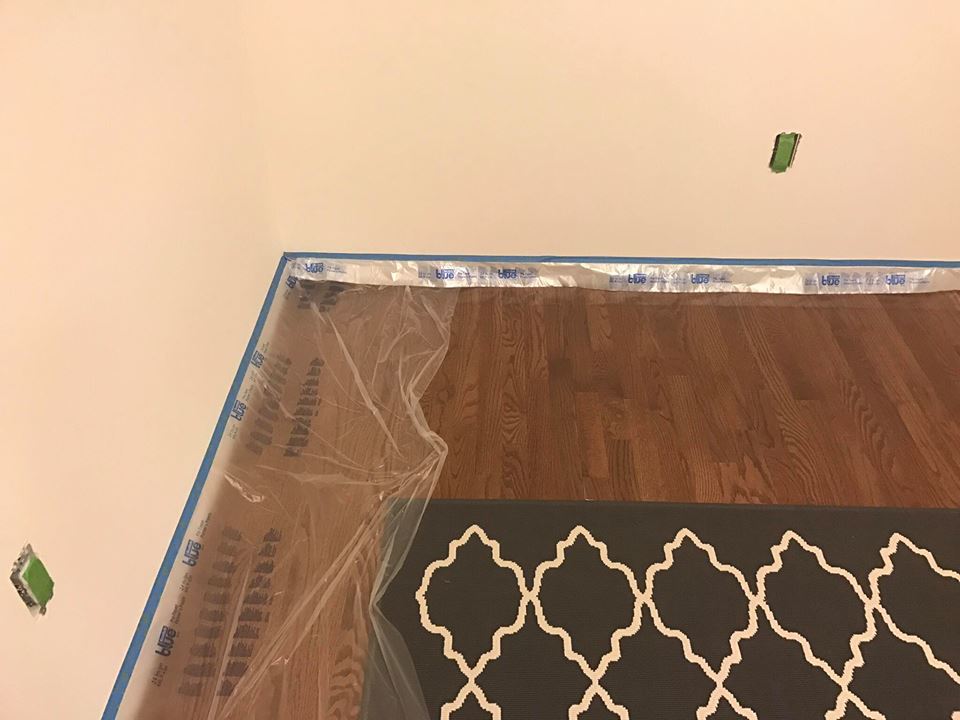
We started with the morning room.  We still don't have any furniture in there (well, except a corner book shelf) so it is pretty easy to prep the room to paint. I bought some painters tape that had drop cloth attached to it.  Hated it at first til I got the hang of using it.  I've since bought more for all of our other paint projects, haha!


And now the morning room!
Here are some before photos:


And, the after!!!  The color we used is Behr's EXPRESS BLUE.  And I. LOVE. IT. It pops so well up against the white trim and doors and windows.  We need blinds in here still, but I still love the light the flows through too.  I also got some WHITE curtains that we'll hang up soon! But for now... the color and the morning room <3


Cody and Crosley really wanted to show off the new color <3

We also decided to paint the entryway from the garage (aka the mudroom) this same color.  I loved it so much and thought it would be great there too (and then the house in the middle {aka the kitchen} will be grey)... and I was right! I was slightly hesitant because we painted the doors black in here and I was worried it was gonna be too dark.... but I am so glad we painted the entryway {mudroom} blue. It looks amazing! I'll have to update soon with photos of the entryway bench and hutch that we have too.  It's white and pops so well off of the walls.  I have to attach the hutch to the wall and haven't had time as of right now.

This wall is where our entryway bench and hutch go.

Basement door


Standing in the morning room looking towards the garage/entryway
Gorgeous, right?!  And I just love the color. And I love that it changes color in the sunlight opposed to the lighting when it's dark outside. So pretty <3

We aren't done though!! We also have another project we decided to start. That's a bit of a surprise still as to WHAT we are doing, but we decided to paint the wall that said project is going on.
It's in the loft.  We put a couple sample colors on the loft wall to help us decide on our grey for the house.  I can't believe I had picked such DARK colors to begin with! We definitely need LIGHTER for the entire house.

Anyways, the loft wall is MISSION CONTROL by Behr. It's definitely a darker grey and we LOVE it here! We love it so much that we also decided that we wanted it on the foyer wall on the main floor. Again, another project that isn't finished as we have bigger plans for it... but it's started!

Pictures!!

Loft- before photos. You can see in the distance there our 3 color choices that we were "between"

Before photo of the loft


Loft- After! Behr Mission Control <3

Loft- Behr Mission Control "after" photo


And here is the foyer hall--

Before (standing in the "living room" looking towards the foyer-- front door is on the left)

Before- Standing at the end of the foyer looking towards the front door

After- (standing in the "living room" looking towards the foyer-- front door is on the left)

After- Standing at the end of the foyer looking towards the front door
Like I said, we have other "plans" for this wall before it's completely finished, but that hasn't happened yet.

I also painted the wall that is behind the downstairs closet in the foyer. It's the wall between the "living room" and "dining room".... I painted it SILVER BULLET by Behr.  This is the color we decided to go with for the entire house. A friend has their house painted the same color, which is how we got turned on to it.  And, it's a great light grey for the entire house.


I've since decided that I'll be painting this the same grey as the foyer wall.  I have plans that require white furniture and frames on this wall, and the darker color will contrast the white stuff perfectly.  So stay tuned on an actual fully painted wall, haha!

And finally.... probably the best painting we have done so far... THE BASEMENT.
We are Reds fans (baseball) if y'all didn't know that.  So the basement is gonna be a favorite spot for us.  All of our memorabilia, decor... it's gonna be pretty damn awesome when it's done.  I guess you can consider it a "man cave", but honestly? I love baseball just as much as hubby does.... so it's OUR man cave.

So- we painted the stairway in the basement RED.  It's Behr's 100 MPH, and it's amazing! I seriously feel like I'm in GABP when I see this!


Painting has seriously made SUCH a huge difference! I love the pops of color throughout the house and can't wait to paint more and finish up some of our projects!  We have also started decorating some of the areas that we've painted, and it's awesome!  I am loving making this house our home!


Monday, February 20, 2017

209 Days In.....

Is that even right?!!? Time is flying and I can't believe we are 209 days (about 7 months) in!!!

And on top of that-- HELLO everyone! I know, like others, I promised to keep the blog up- but let's face it:  Life happens.  I have a huge list of house projects and this is how it goes: start a project, love it and get it like, half way done, and then move on to something else.
Yep, the projects are those kind of projects.

Things like painting the interior doors black-- there are like, 18 doors in the house. That is taking quite a while.

Painting.  That most definitely hasn't started yet but we are trying to pick out colors.

Furniture.  It's a heck of a task to go from a 1300 square foot apartment to a 2600+ square foot home, and trying to fill it with furniture.

We need more furniture. Lots more furniture. Lots of empty space right now, but we are getting there.

And then just having the time to do these projects.  We do lots. We love to stay busy, and a lot of the time our house projects kinda get put on the back burner to go have fun.

But-- I thought I'd update a bit of what we DO have done..... The majority of the interior doors have been painted black. What a huge difference it makes! Such a nice pop of color from the boring ole white and off white walls.

We switched out our shower head in the master bathroom for a fancy-schmancy one that does all sorts of fun stuff (it was on my Christmas list and we got it for Christmas!).

We have our awesome entertainment set up put up from IKEA that we bought before we even finished building the house.  It needs some slight adjustments and I don't wanna do those adjustments til we paint. But, it's massive, and amazing and looks great against the wall between the 2 windows!

Furniture stuff: Another Christmas gift we received was an awesome entryway bench and hutch from Home Depot. It was a bit of a headache dealing with it, but it's AMAZING and fits in the space perfectly.  Loooooong story short: I loved the bench, showed it to the in-laws and they got it for us or Christmas.  My Father-In-Law noticed on some of the reviews that the hutch didn't fit the bench perfectly.  Shame on me for not paying closer attention to that.  And sure enough- when we got the hutch in and assembled it, it didn't fit perfectly on the bench.  I did some research and actually got in touch with the manufacturer and they shipped us an updated hutch that is perfect for the bench!!!! YAY!

Front room (on the floor plans it's technically designated the "living room"):  We got some Billy Bookcases from IKEA and filled up the entire wall with book cases.  I'll eventually try my hand at adding some molding to them to make them look "built in".. but I love all the space for all of our media goodies!

And naturally, we are having our "new home" woes-- specifically a couple of cracks in our foundation :-(
Yeah. You read that right. Cracks.  In our foundation.  We first noticed a leak in one of the unfinished parts of our basement. It dried quickly, but we had some pretty wet weather there for a while and the leak came back. We surveyed the outside of our house and found 2 cracks in the foundation (we have a pretty high elevation and have a good part of our basement exposed to the elements still-- which includes our amazing walk out basement).
So here we go with something I've become a pro at:  filling out the online service request.  The first one I filled out got NO response, so I filled a second one out about a week later.  A foundation company called me the next day.  I gave them an earful as they wanted to schedule a time during the WEEK to come out and take a look at the crack.  Luckily this worked, as well as the fact that they also have weekend hours (woohoo!). So we had someone come out on a Saturday.

The guy (well, more like a kid) that came out told us that the crack was from the pressure of the support beam running across the top of the basement, as was fairly common.  He did some nifty filler thing to help stop the leak.  We asked about the SECOND crack on the foundation. It is smaller in size than the crack that caused the leak, but he walked it to "measure" the distance and believes that crack is the same type of thing as the one he repaired.  This one is a bit more tricky as it's in a finished part of our basement.  He checked the support beam area and said that he didn't see any signs of leaks or anything, and even mentioned that Ryan Homes puts in baseboards that turn a yellow color if there's water behind them.  So, he did nothing with the crack.  I think when it gets closer to our 1 year, or when we have a few days off, I am going to get them to come out and assess that one again. I don't want to be dealing with it when it's our problem and not something that they should have fixed anyways!

So how about some photos! I have tons and will do my best to put descriptions on them, haha!!


This about the extent of the snow we got this year so far.  Just a little dusting to freak out the puppy, haha!


Fancy new shower head <3

Before painting the doors upstairs (this would be the master bedroom, hall closet and guest room)

After painting!  (this would be the master bedroom, hall closet and guest room)

More before shots 
After shots


Before  (this would be the master bedroom, hall closet and guest room)

After (this would be the master bedroom, hall closet and guest room)

Our new hutch and bench in the entryway off of the garage (mudroom)

Our new hutch and bench in the entryway off of the garage (mudroom)
This is in the front room of the house (family room)... Billy Bookcases from IKEA


Another view of our bookcases in the front room of the house

random photos:  Sitting on the couch looking towards the kitchen

random photos:  Standing in the entryway (mudroom) door looking towards the family room

random photos: Standing in the kitchen looking into the morning room

random photos: Standing in the morning room looking towards the front of the house 

random photos: another view from the couch into the kitchen/morning room {we will one day have a dining room table in there}

random photos:  Crosley <3

random photos: our IKEA entertainment stand-- we still need to put the middle piece on its legs and then adjust the height on the cabinets to the right. But this won't be done til we paint. I'm not taking these things up and down a bajillion times.

random photos: Standing in the hallway by the stairs looking towards the family room.

random photos: The "dining room" according to the floor plan. For us, it's the bunny room {yes. you read that right. We have 2 bunnies}, and random boxes yet to be put somewhere/unpacked

random photos:  Front entryway

random photos:  Messy floors and Crosley doing the dishes.


And, the foundation crack:

Wet basement floor.

Worse wet basement floor.

This is the *second* crack. This one isn't fixed. It coincides with a finished part of the basement and the foundation kid didn't do anything to this one-- just checked to make sure it wasn't leaking.

THIS one is the culprit of our leaks.

The other side of the crack. Awesome, huh?

All filled and fixed and no longer leaking.

But it's kinda hideous.
So I most definitely plan on having someone come out and address the second crack before its all said and done. It's just finding time with the great time slots that Ryan Homes and their contractors offer.

We have TONS of other projects going on/waiting to work on. We stained our deck before it got cold, but it really needs one more coat.

We have lots of stuff built in the basement for our "man cave/Reds room" but don't have it all organized yet.

The loft:  We are going to make this a "travel themed" area.  We LOVE LOVE LOVE to travel and have so many awesome trinkets and memorabilia and things from our travels to display.  Well, another Christmas gift that was on our {my} list... A giant wall mural that is a map of the world.  It will nearly cover the entire wall in the loft on one side.  We haven't put it up yet because we need to paint {since it won't cover the ENTIRE wall}.  I found it on Wayfair:  Check It Out Here.

We love our home and have so many great memories already that have been made and can't wait for more.

And, to end the post: a super adorable photo of our sweet boys from yesterday, in our 65 degree weather in February.